Older Jetted Bathtub (spa) leaks, Common Problem!

This is like the fourth in our series of Sealants and Epoxies are your friend.

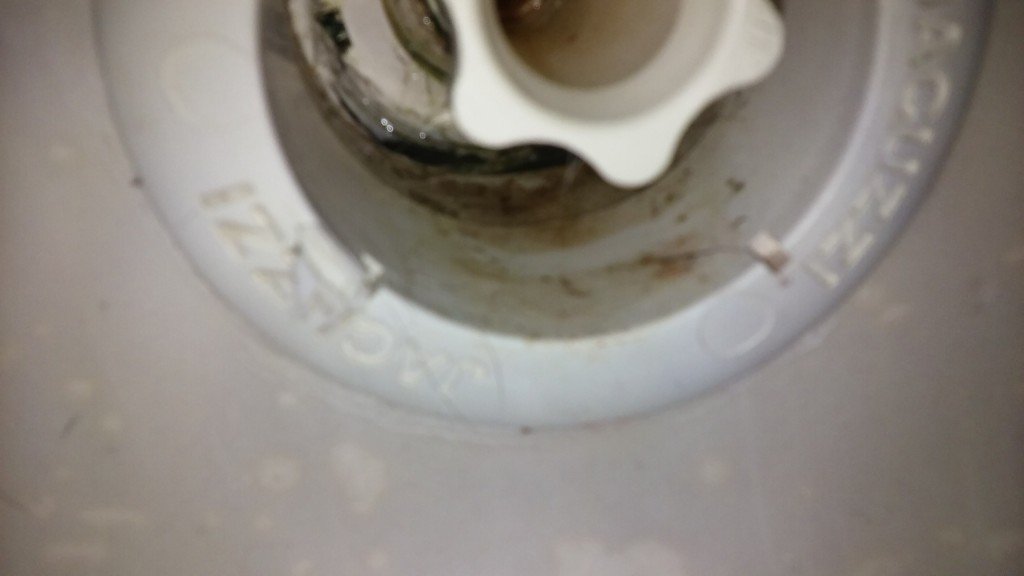
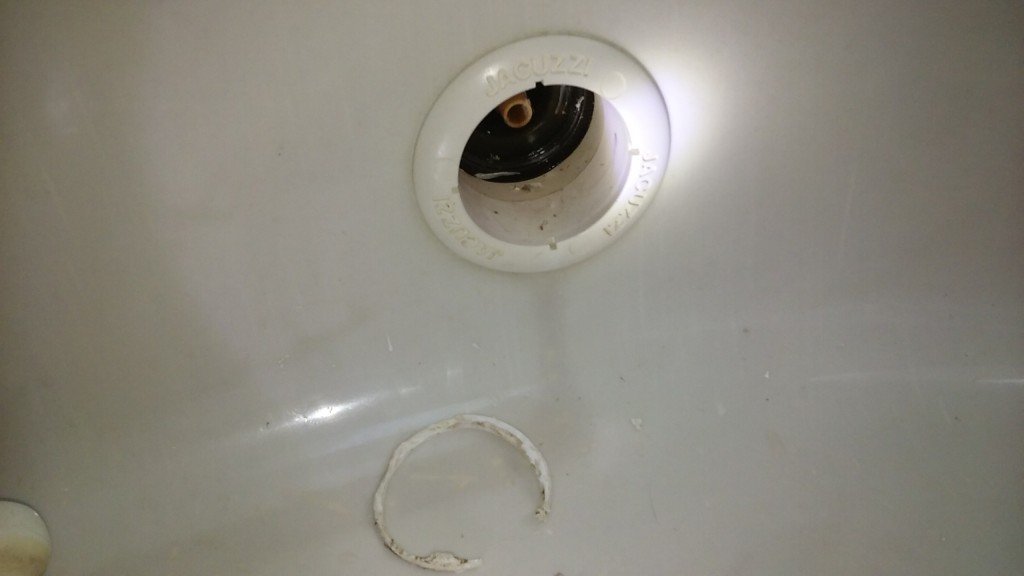
Below is a photo of a VERY common leak problem in bathtub spas, also known as ‘jetted bathtubs’.

The most common bathtub spa/jacuzzi leak ever

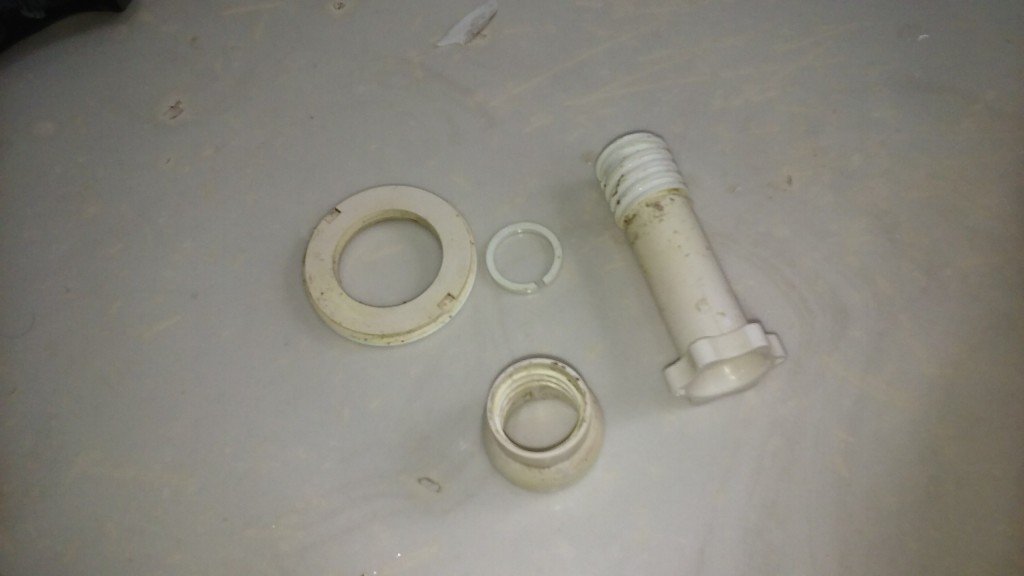
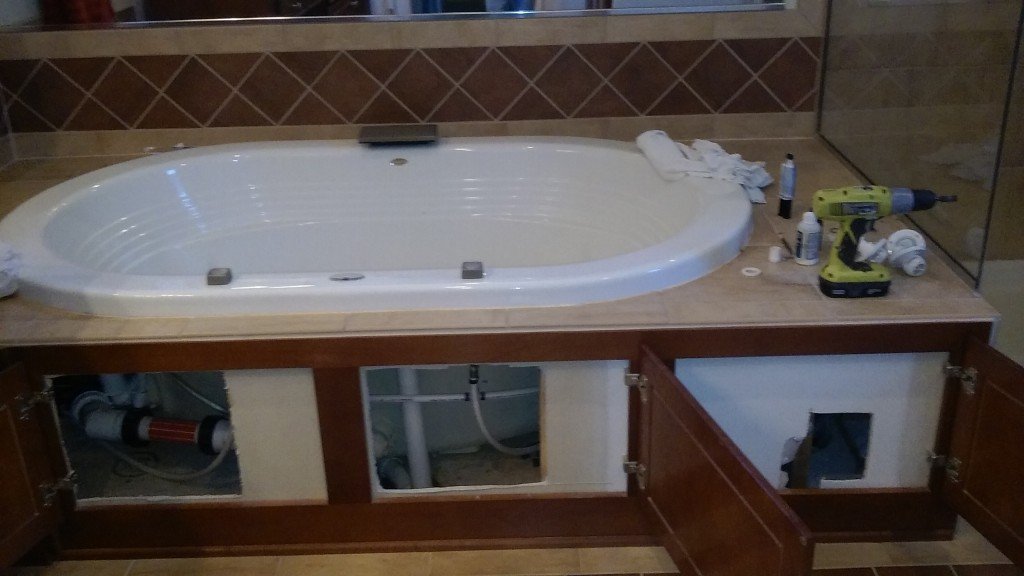
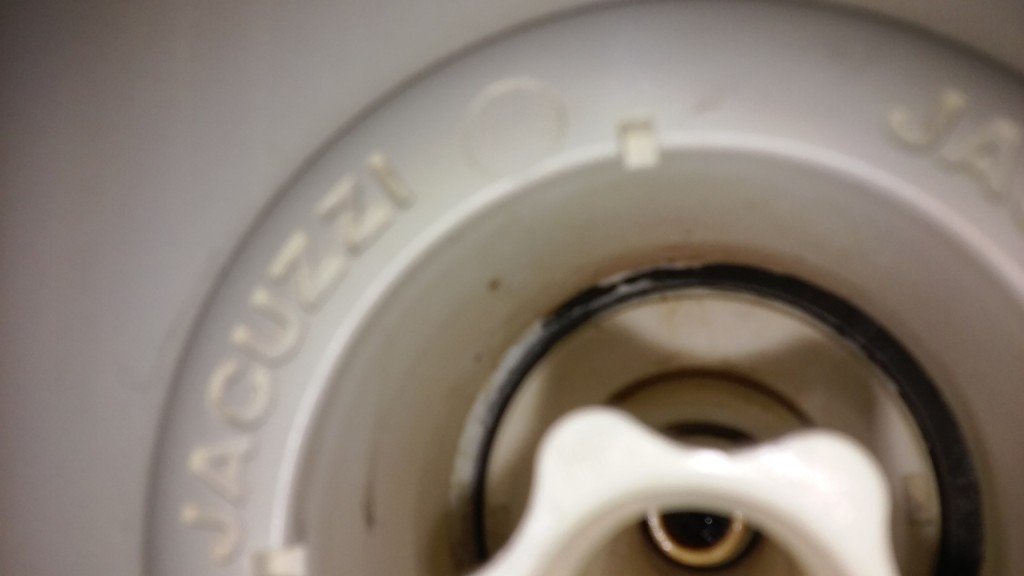
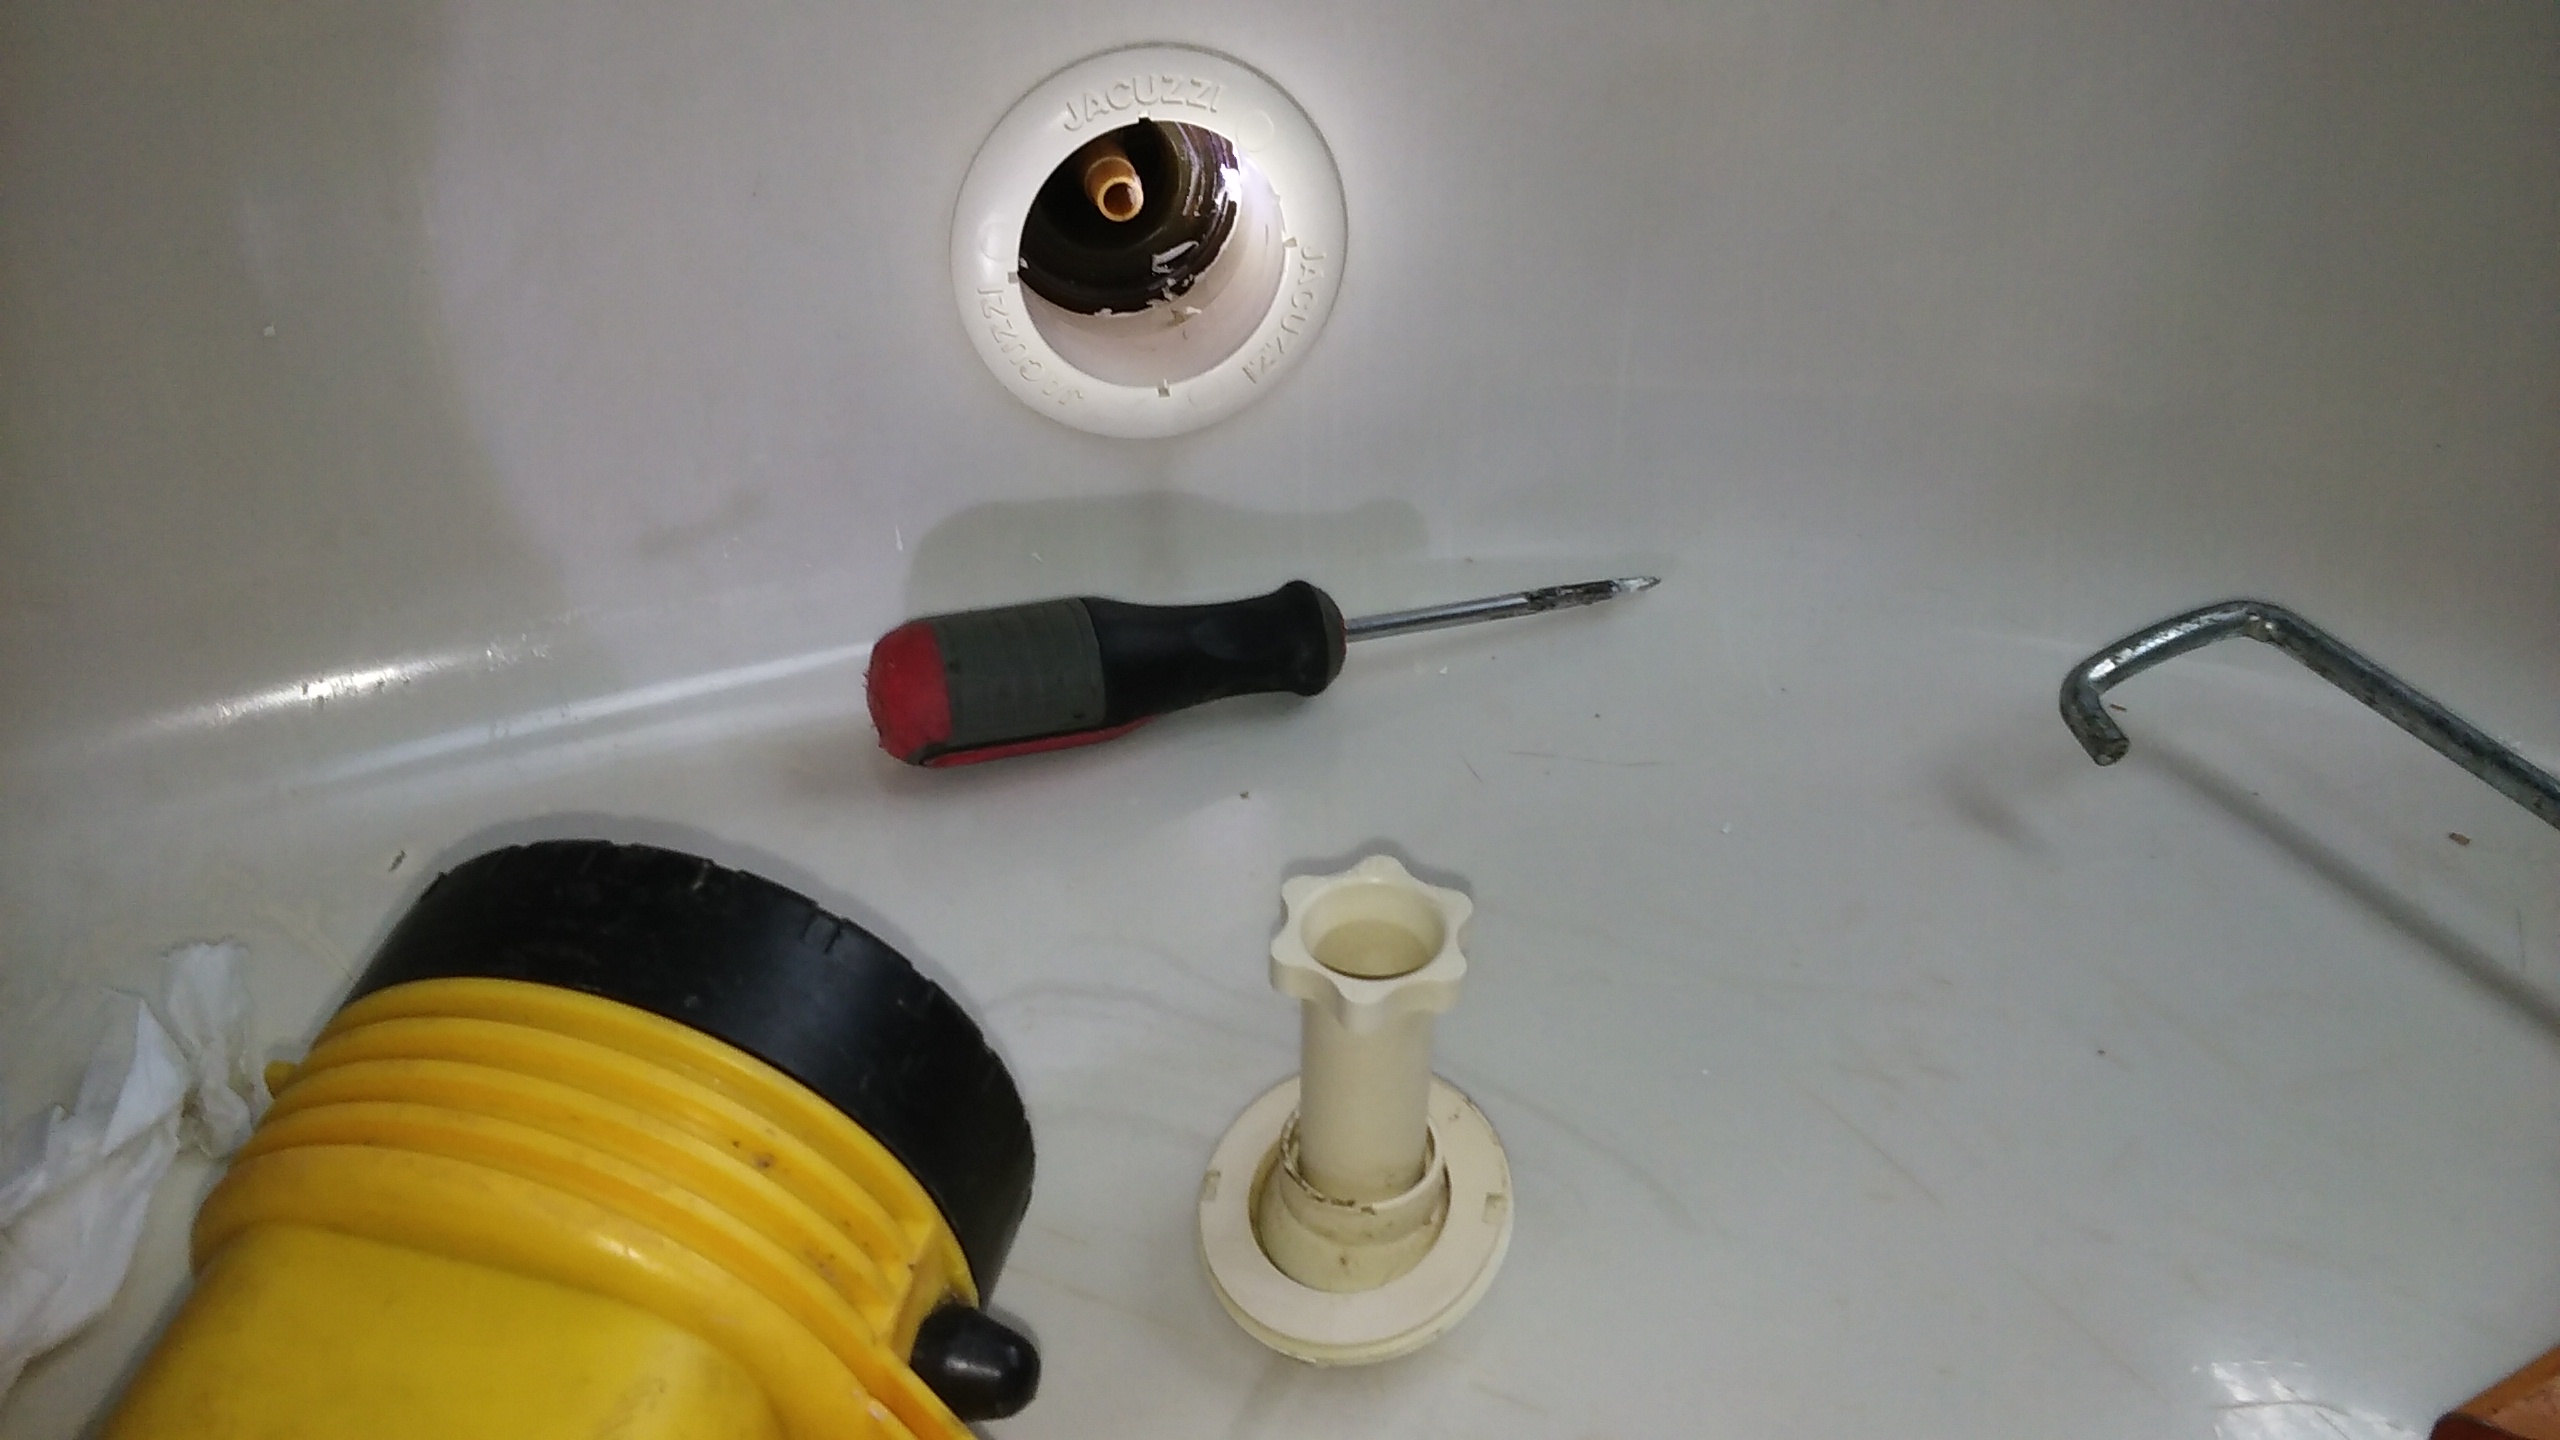
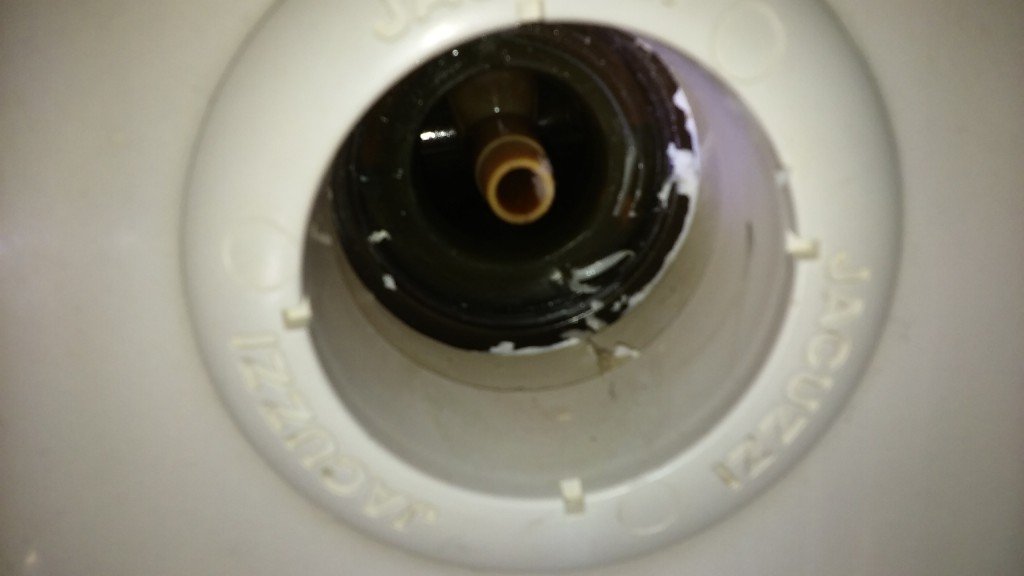
This tub uses the most common type of spa jet – a simple hollow ball with a nozzle.  Where these things most often leak, is from the flange edge that you can see in the photo above – that is visible.  At the junction of where that flange touches the tub, behind that is either silicone sealant, a gasket, or both.  Both is rare.  The customer that owned this bathtub had already removed everything around the tub for full access and diagnosis of the leaking problem he was having.

The solution is simple. Simply seal the area of the outside edge of the jets – all of them! Not just the 3 we had leaks on.  If the other 3 aren’t leaking now, they will be soon. It’s a quick and easy procedure and took less than 45 minutes to perform.

Enter our un-sung hero, Loctite Marine Epoxy – with a paint brush, and pvc pipe cleaner, which is nothing more than a mixture of acetone and MEK.  The small paint brush is used to ensure accuracy of application and limit excessive waste and over-application of the epoxy.

The magic toolkit - Epoxy and PVC Pipe Cleaner

Using the clear Oatey pipe cleaner around the edges of the jet flange and the tub, then drying it out with a paper towel – it ensures a great bond for the epoxy.  This is a really simple, quick and easy repair – I did 6 jets in less than 45 minutes.  Just take your time and use common sense. Typical home-owner repair cost? Less than 15 bucks!

Here’s how it looks!

Re-sealing Bathtub spa jet!

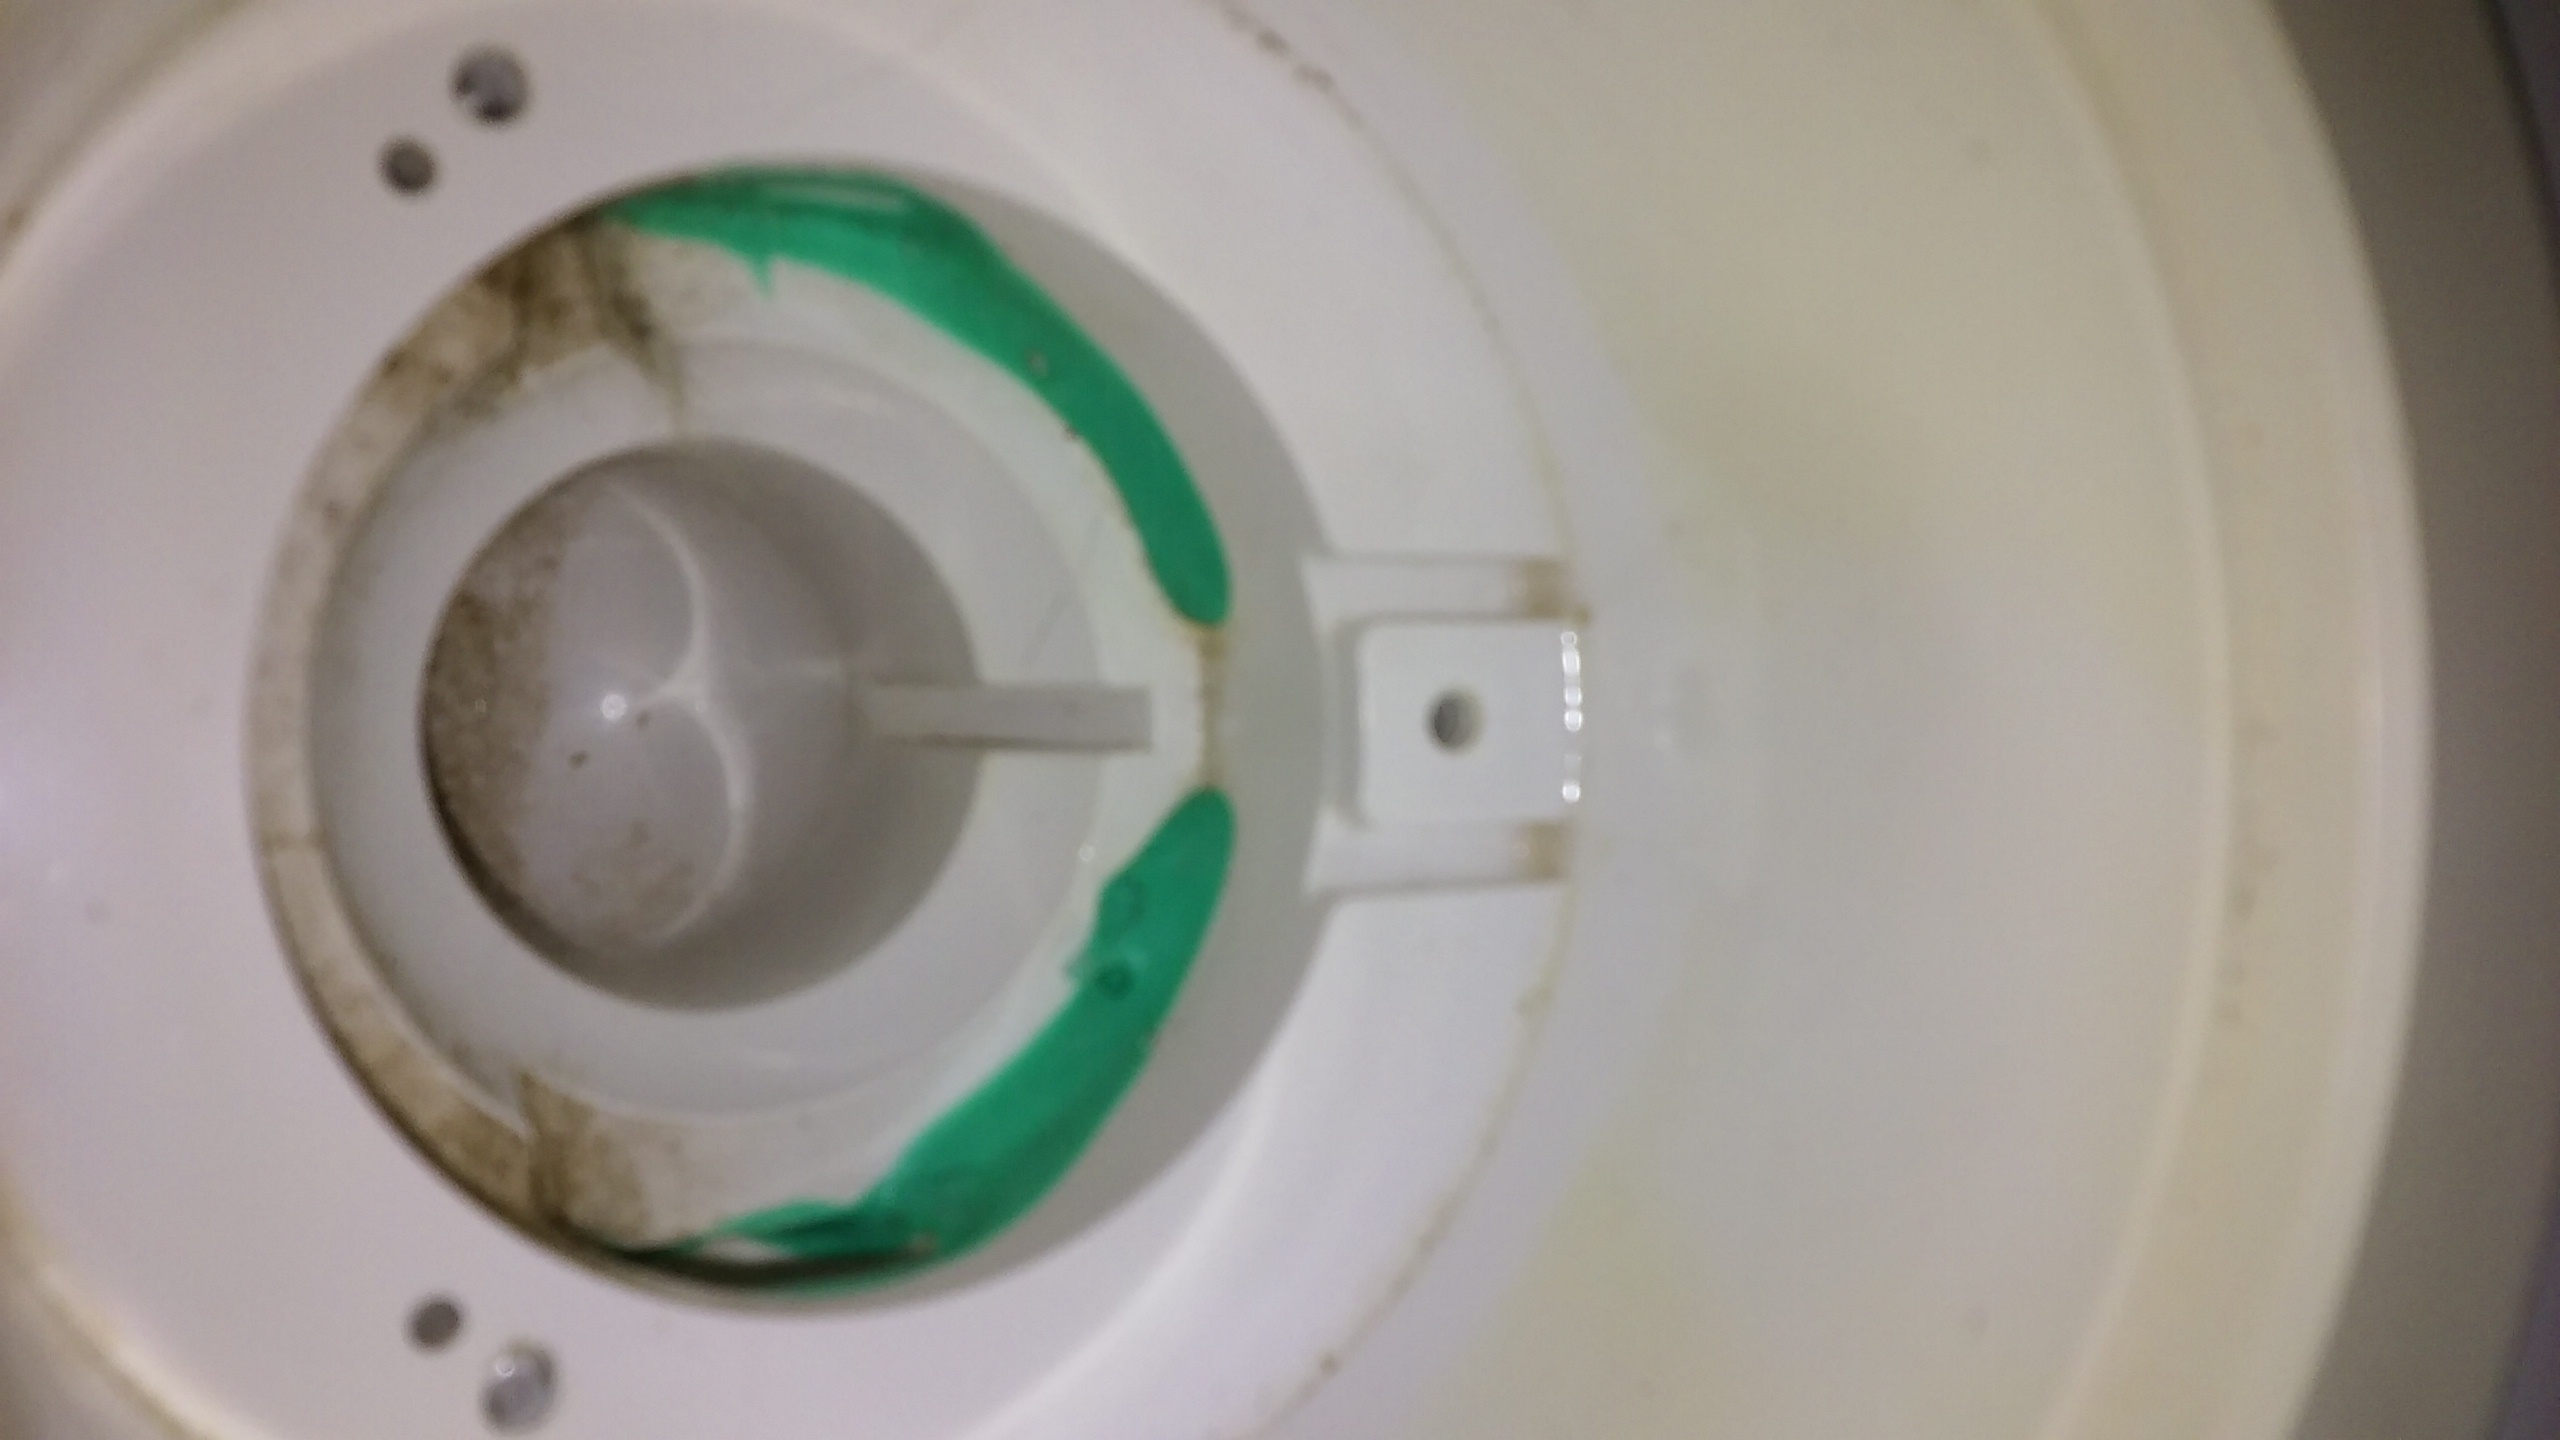
Note that the above photo shows the epoxy applied to the bathtub jet, with the jet insert removed.  In this style of installation, it’s usually pretty easy to unscrew the outside of the jet flange, and remove the flange and the jet nozzle which makes the repair easy.  Once finished, simply re-install the jet nozzle and the flange.  Any questions? Give us a call we’ll give you a hand with this.

phone

Leaking Jetted Bathtub – Hard core problem!

This one was epic. Take a look!

Broken flange on jacuzzi bathtub jet
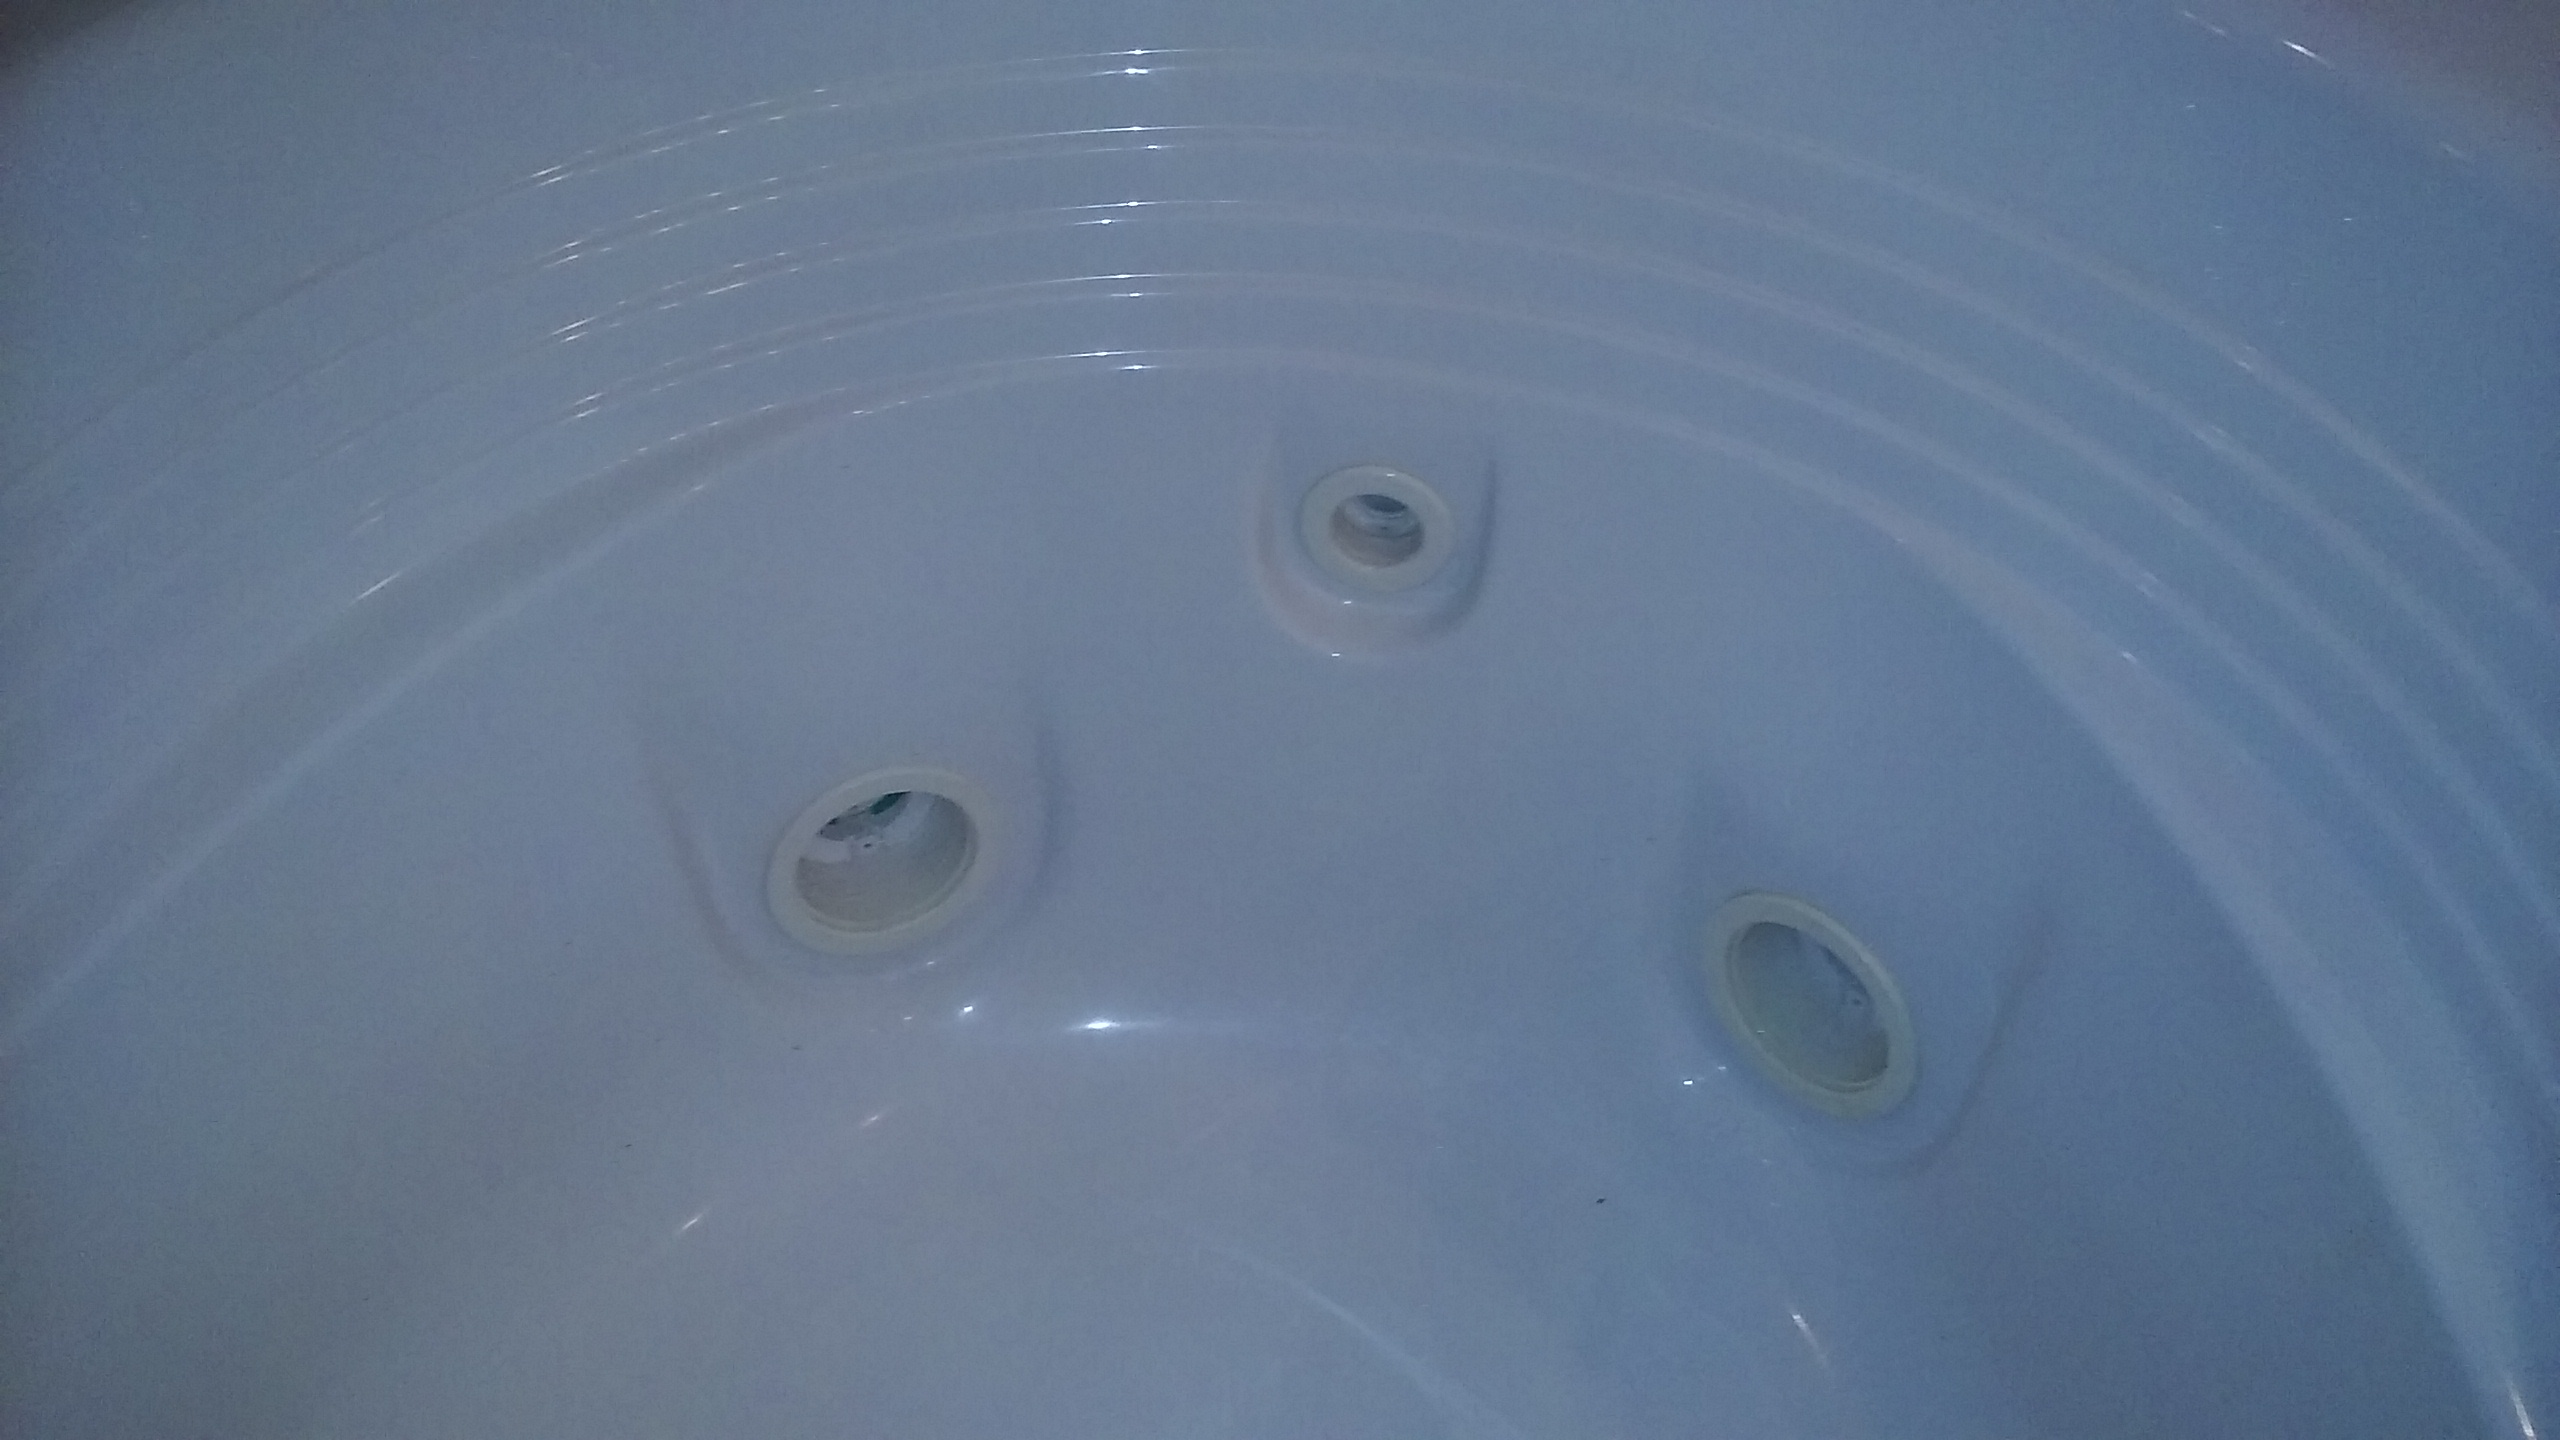
Once you see something like this – you think, OMG, the tub needs to be replaced – $6000!

Well yes and no. In this particular instance, ALL 6 of the bath spa jet flanges were broken completely off, which begs the next question:

Can the jet flange be removed? (Unscrewed?) The flange is the part that holds the jet body (back part) to the bath tub.  During assembly, silicone sealant is used to seal the body to the tub to prevent leakage.  The good thing about this particular tub is that the silicone sealant was actually holding well, which means a small chance of leaking in the future, as long as the front part of the flange is properly secured to the tub.

Here’s another:

Face flange broken on a jacuzzi bath jet.Like I said, seeing a flange completely disintegrated like this can lead to horrifying expense, but in this case – again – the jets could not be pushed out of their place. The silicone on the back side was continuing to hold them where they were installed.

So – in this case basically we need to provide a sealing surface on the front of the jet – and a mechanical aid to continue to keep the jet attached to the tub.  Enter our hero – White Marine Epoxy.

The solution is quite simple. Clean the cracked surface and the adjacent area of the tub surface with clear pvc pipe cleaner – then with a paint brush apply it around the cracked area and join with the surface of the bath tub.

The magic toolkit - Epoxy and PVC Pipe Cleaner

This is in no way a perfect fix, but if you cannot remove the flanges then it is the ONLY option possible.

Here is what the finished repair looks like:

Repaired Jacuzzi Jet with Marine White Epoxy

Of course this is not an elegant solution in appearance, but it is an elegant solution on the wallet!  It provides for both a water-tight seal for the jet flange and body, plus it reinforces the jet body to the bath tub, negating the need for a removal and complete re-plumb, or worse – a bath tub replacement.

If you do this yourself, the repair’s total cost is less than $15!  Call with questions any time.

phone

Leaking Jetted Bathtubs (spa) – Part Two

This is part two of the Sealants and Epoxies can be your friend series.

In this example of a leaking jetted bathtub, what I found was that the internal jet bodies were leaking.  Additionally, it was discovered that this had been repaired in years past, and the silicone that was used was peeling off.  Note these were not cracked jets, it’s just that the internal body parts were glued together and it had partly failed, leading to a very leaky tub.

It is important to note that whenever you use a silicone in a submerged situation like this and it is applied to the surface of a leak, that periodic re-sealing of the area may be required.  IE the more often the tub is used, the more frequent the replacement.  That said, if silicone is used in a joint/flanged situation, as long as it has been given enough time to cure, it should last for many years.

Jacuzzi bath jet that has old silicone causing a leak.

Looking closely at this Jacuzzi jet body it appears there has been some silicone applied at some time in the past and it is visible at the bottom near where the jet nozzle flange is screwed in.


Jacuzzi bath tub jet that is leaking

On another jet, I can see what appears to be some white silicone sealant in the back (between 9 and 11 o’clock in the back) of this Jacuzzi bath jet, and it’s apparent that pieces of that white silicone have come loose also; (not visible in photo).


The solution is really simple – unscrew the jet nozzle, clean it out, prime it (using pvc clear primer), and add new silicone sealant.

Jacuzzi bath nozzle and jet body assembly - nozzle is removed.This is not difficult for the average home-owner to do. It’s quite simple.  Using a screwdriver in the base of the ring that holds the nozzle, you have to ‘un-screw it. The nozzle assembly will come right out (but you may have to fight it a bit to get it to initially rotate).

The above is what a Jacuzzi bathtub spa nozzle assembly looks like. With the flashlight, you can also see where the previous silicone when it was installed – is flaking out, causing the leaks with this tub.Silicone flaking off a seal joint in a bath tub spa.


Here’s a close-up of the Jacuzzi bath tub jet. Note the failing silicone.


Silicone removed from leaking Jacuzzi jet


Another jet where the silicone came completely out of the threaded body, causing a leak.


This is how I set this up for re-sealing. Using the dauber for clear pvc pipe cleaner, swipe the internal part of the Jacuzzi jet body and then be sure it’s dry.  getting ready to use silicone to seal a jacuzzi jet.
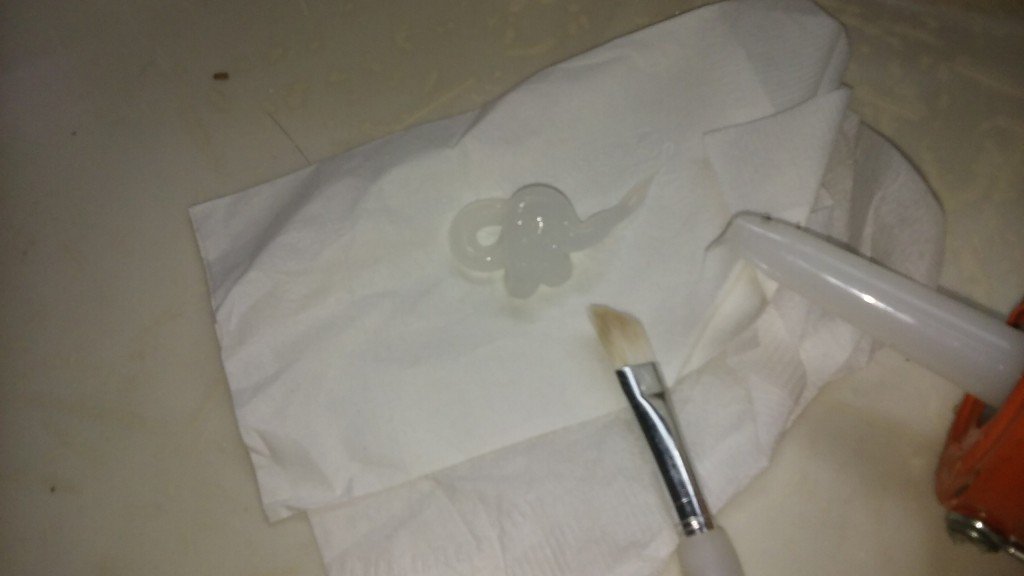
Then I put clear silicone caulk on a paper towel, and use a small paint brush to swipe it into the area where it needs to go to seal the bath-tub leak.

This is actually easier said than done,  because of the density of silicone, but the brush is infinitely better as an initial applicator, than the nozzle of a caulk gun – and definitely better than using your fingers.  The paint brush provides accuracy and cleanliness, which is an absolute requirement when you have to do more than 1 or 2 jets.  I always keep a few of these paint brushes with me because you have to throw them away when you’re finished.

Here is what the removed Jacuzzi bath nozzle assembly looks like completely disassembled.Jacuzzi bathtub jet nozzle removed from the body.

There were no final photos taken of this job but I will say that after the silicone was place where I wanted it to go, I did use my index finger to ‘smooge-it’ in a circular fashion to cover the leaking joints completely.  It works, and it’s cheap to do!

phone

Sealants and Epoxies are your friend

When it comes to repairing ‘broken’ or cracked things on your tub – because replacing them may not be a viable option, too expensive or too troublesome to do – there are a number of cases where a simple two part epoxy, or even ordinary silicone sealant can be a massive time and money saver.

Bathtub spas, and those that go by the manufactured name ‘Jacuzzi Whirlpool’, are frequently an example when having sealants and epoxies are a serious part of your tool-box.

Let’s take a look at this first example, it is a Jacuzzi Whirlpool bathtub that has a couple of cracked jet bodies.  Many people would think that it would be a requirement to cut out the broken jet, replace it and then replumb it.  But what if just getting access means taking the entire tub out?  Ouch! That can get expensive really quick!

Jacuzzi Whirlpool Bathtub

In this example, you can see I’ve got Plast-Aid, as well as Marine Epoxy (white) you can see on the above Jacuzzi Bath to the right.

20161009_162922With the bathtub spa jet internals removed (only takes a phillips head screwdriver), the cracks in the jet body are easy to locate.

Once found, I prep the area with a swipe of pvc pipe cleaner, ensure it’s dry, then apply an amount of Plast-Aid directly over the crack.  That will be cured in about 15 minutes. Then a follow up with a coating of white Marine Epoxy.

It can be a little tricky spotting what I call a ‘micro-crack’ – but if you can locate the leaking jet body first, then it will give you a target to focus on. Jacuzzi Whirlpool bath with a cracked jet body.In this jet body, that small slotted area to the right (behind the green cement), there is an arched crack that appears in the concave swivel ball (jet nozzle) seat, and stretches across that slot to towards the bottom.

Sometimes, because these things can be really TINY and difficult to see, using a camera on hi-resolution, then zooming in with the screen will help you locate cracks like this. To repair this crack, Clean the area with pvc pipe cleaner (Clear!).  Then I simply mix a two part epoxy (I prefer the Marine White) and use a small disposable paint brush to accurately paint the epoxy over the crack.  Overlap is important and will determine how strong your repair will be.


For the next example, Click Here!

phone